Scaling Pattern Pieces – A Tutorial
I may have used affiliate links for some of the items in this post. Using an affiliate link to purchase an item won't cost you any more money, but I may receive payment if you click on a link and make a purchase. For more information, visit the disclosures page.
Ok, you’ve found the PERFECT bag pattern. You absolutely adore it. BUT it’s not the right size! What do you do? Do you pout about it and spend another 10 hours scouring the internet for the perfect downloadable pattern, or do you adjust it yourself? If you’re like me, you adjust it yourself. And here’s how to do it.
What you will need –
- PDF pattern
- PhotoShop (or other photo editing software)
To start you need the pattern, so make sure you have purchased and downloaded the pattern of your choice. I will be using the Sew Sweetness Aeroplane Bag and the Michelle Patterns Pleated Wristlet for my examples.
Now, is your pattern too big or too small?
Make it Smaller
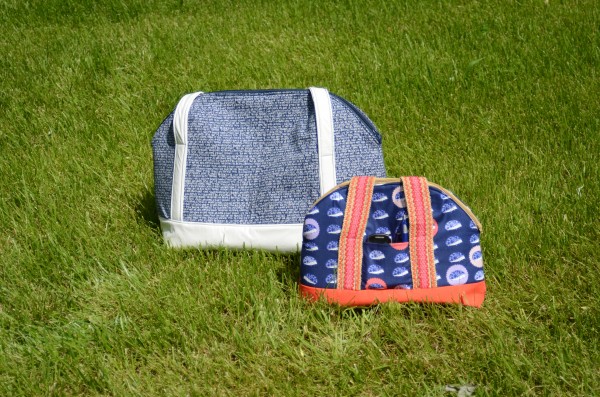
If your pattern is too big, you will want to scale down your pattern. In this example, let’s take the Sew Sweetness Aeroplane Bag. It’s an amazing carryall for trips. I use mine to carry all of my gym/running supplies. But, I loved the shape and wanted a version about half that size for day to day use.
You will want to open your pattern in PhotoShop. Simply choose File < Open and select the PDF file. A box will open asking you which page you would like. You will need to open each page that includes the pattern pieces.
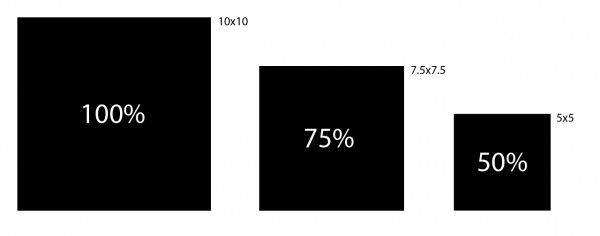
Once they are open, you will need to decide how far down you want to scale the pages. Because of the way geometry works printing the pattern pieces at 50% will actually give you a super small bag that is only 1/4 of the original size.
Instead, we want something a little larger. Let’s pretend our main pattern piece is 10″ square. That means printing at 75% would give us at 7.5″ square and 50% a 5″ square.
Hopefully that makes it pretty easy to do some quick math in your head, on a calculator, or on google to figure up the size you want. Once that’s done, you can scale down your bag. I found 75% was a great size for me for the Aeroplane Bag.
Now to scale the image down. On the menu bar choose Image < Image Size. When the dialog box opens change pixels to percent and type in the percentage you decided on. Save your file and print.
Now Make It Bigger
We know how to make stuff smaller, but how do we make stuff bigger? What if I found a wristlet with an amazing shape, but I want a full sized bag? I can do that simply by scaling the pattern pieces up. And the best part is that scaling the files works the same way. You open your PDF pattern pieces in PhotoShop and change the size before saving them.
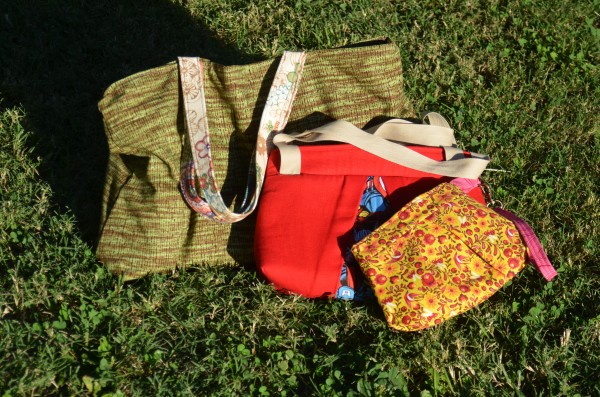
So how does the size work when you scale up? 200% is 4x the size of the original file. That means for me, a 125% scale of the large sized Michelle Patterns Pleated Wristlet made a perfect shoulder bag. In the photo below, the red bag is a 100% version, and the green bag is 125%.
Now, printing the enlarged template requires a bit more work. If you can’t print on larger paper, you will want to reopen your PDF image in Acrobat instead of printing directly from PhotoShop. Once the page is open in Acrobat, choose File < Print. In the dialog box that appears change the scaling from None (or Scale to Fit) to Tile Large Pages. That will tell your printer to print the new template on 2 or more pages if necessary. It requires a bit more paper, and more taping together, but you will end up with a great result.
Important Tip
If your pattern has pieces that need to be cut, but don’t have templates, make sure you do the math to scale them so that all your pattern pieces work together.


I am glad to learn this method for changing size. My math sucks lol Thanks for sharing.
You are very welcome! I hope it’s super helpful for you. Let me know if you make anything using it.
Awesome! Thanks for sharing.