
My Quilt Design Process
I may have used affiliate links for some of the items in this post. Using an affiliate link to purchase an item won't cost you any more money, but I may receive payment if you click on a link and make a purchase. For more information, visit the disclosures page.
Though it’s something I haven’t had much time for with the new baby, I love making quilts. I think it’s the concept of taking a stack of fabrics that anyone could have and making something completely my own.
My design process usually starts with a specific fabric or concept. I often find myself attracted to fabric panels, which make great design opportunities. For this particular example, I am going to talk about the quilt I made my mom for Mother’s Day a few year’s ago. It started with the large panel design from the Sweet Life line by Cori Dantini for Blend Fabrics.
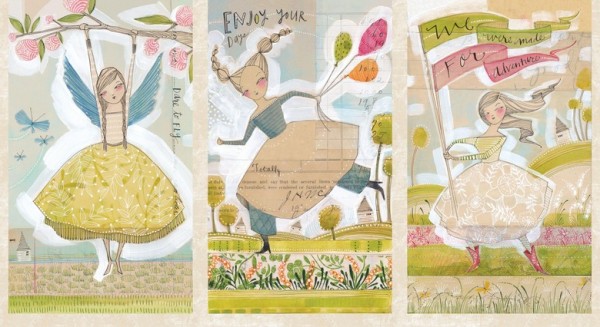
And while you aren’t likely to find this particular panel anymore, the concepts I use to design my quilts would work with any panel.
Once I have my panel, I decide on a size for the quilt that will work well to incorporate the panel and make the sizes of other blocks easy to work with. In the case of the panel above, it could easily be divided into 3 blocks that would finish at 12×22-inches. 12-inches is a great width, because almost any block can be made in a 12-inch size. And a 12-inch square can easily be divided for 6, 4, 3, and 2-inch blocks.
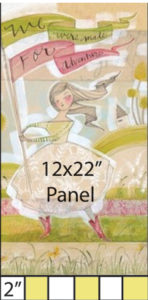 That 22-inch measurement was a little screwy to work with though, so the obvious solution for me was to make each of the panel pieces measure 24-inches tall by adding a border of 2-inch squares along the bottom.
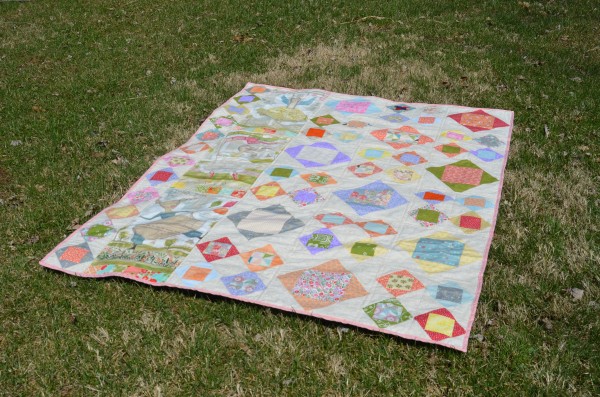
From there, my next decision was the overall size of the quilt. 2-yards (6-feet or 72-inches) is a great height for a throw. Now, if I was making a quilt to hang on my wall, I would automatically go with 72×48-inches because that size works well on my wall. But since this was going to be a throw that would be used, it needed a little more width. In this case, I decided an extra 6-inches would be fine, giving me a finished size of 72×54-inches.
Once I have my dimensions down, I pull out my graph paper and start playing with possible ways to lay out the quilt. While most quilters prefer symmetry, I’m a big fan of asymmetrical design, and with those extra 6-inches I added to the width of my quilt design, it was something that was almost guaranteed to be incorporated.
I ended up decided to stack all 3 of my panel blocks on top of one another, giving myself a 12×72-inch strip of fabric. I placed that strip 6-inches into my quilt layout, leaving myself a 6×72-inch strip and 36×72-inch section to work with. I took that large section and divided it into alternating 12 and 6-inch block sections. And also divided my strip into 6-inch blocks.

That was going to give my design a total of 9 large (12-inch finished) blocks, and 48 small (6-inch finished) blocks. Now, I chose to use all economy blocks in the quilt I made, but you could easily switch out the economy blocks for your favorite block, or any combination of blocks as long as they finish at the right sizes.
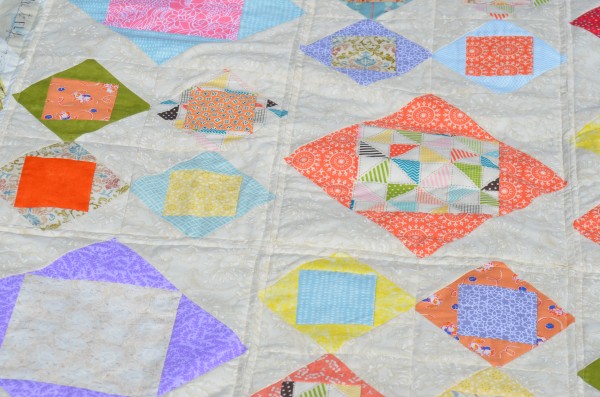
You could even use this layout to use up all of those orphan blocks you have laying around and change out the strip of panel fabrics for a big crazy patched piece, or to accent some fun vintage fabric you’ve been hoarding.
If you have any questions about my design process, don’t hesitate to ask. And, of course, feel free to use this layout on your next quilt.
Sharing over at:
Thread Filled Thursdays at Houseful of Nicholes
Buy lasix
http://rxnoprescriptionrxbuyonline.com/plavix.html
http://rxbuyonlinewithoutprescriptionrx.net/zocor.html
http://buywithoutprescriptionrxonline.com/fluoxetine.html
I’ve always been intrigued with your process for quilt tops. Thanks for joining the linky party!
Thanks for having it! I’m looking forward to checking out everyone’s stuff.